
Vertical Video Editing For Mac
I probably don’t need to tell you not to shoot videos with your smartphone held vertically. Since you are reading this blog, you are obviously smart and sophisticated. You probably are also one on the six million people who have watched this public service announcement:. But honestly, there are times when it is more convenient or useful to shoot vertical (sometimes called portrait) video.
Dec 30, 2014 Maybe you can save your vertical video and share it with the world. I'm using Final Cut Pro X in this video editing tutorial. So many people grab. An even more compelling reason for vertical video is that some projects are designed specifically to be viewed on tablet computers, smartphones, or E-readers, where the vertical orientation is arguably the more natural way to watch video.
For example, a family member might be doing something absolutely hilarious, and you want to capture it on video. But if they see you holding your phone horizontally, they are going to know that you are filming them, and they will stop doing the hilarious thing. The moment is lost. On the tech side of things, some videos are intentionally shot vertically; sometimes because the subjects that are taller than they are wide, and increasing the distance between camera and subject to capture it all horizontally would mean losing resolution detail. An even more compelling reason for vertical video is that some projects are designed specifically to be viewed on tablet computers, smartphones, or E-readers, where the vertical orientation is arguably the more natural way to watch video. STEP 1: So here’s a suggestion for using PowerDirector to make vertical video presentable.
For example, you may wish to insert a new blank page at the beginning of your document ( Insert > Blank Page from the Word toolbar). At the far left of the References tab you’ll see a button labeled Table of Contents. Once there, click the References tab in the toolbar. 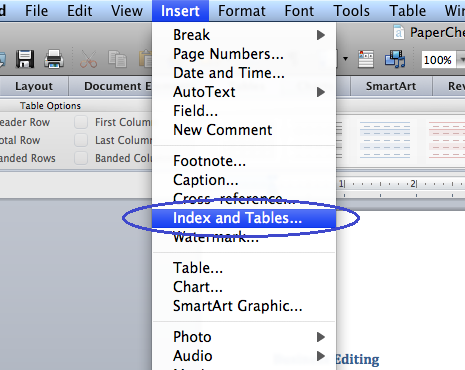
(NOTE: PowerDirector will probably auto-rotate your vertical video, as it can read the file's EXIF data and act accordingly. If your video is already rotated correctly, skip to STEP 2). Select the video in the timeline, so that you can see the blue crosshairs on the image in the Preview Window. Click on the crosshairs and drag to rotate the image. Then click on one of the middle white buttons on the periphery to resize the image (since after rotation it will be too tall).